


Category Archives: Photography Tips + Tricks
even though i take at least one photo every single day, i find that i rarely print them. i’ve been in the awful habit of only printing my photos around christmastime for our annual photo card or to create a photo book of my annual photos once a year. but i haven’t been printing just…
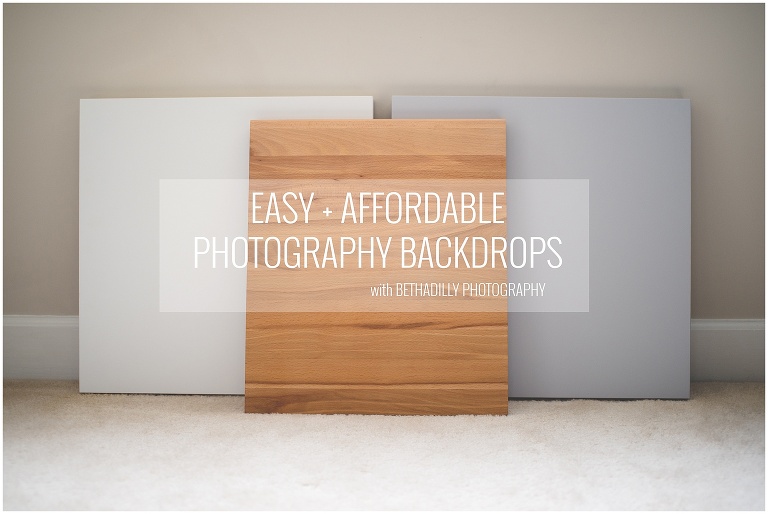
one of the most common requests i receive asks me to share pullbacks of my photo set ups and share a little behind the scenes glimpse of how i create my photographs. well today, your requests have been answered! in addition to a pullback that will show you how i set up my photographs, i…
-
These are great ideas and so creative! Apparently I need to get to Ikea soon! Thank you for the tips.
-
thank you! have fun shopping! i always buy way too much at ikea! 😉
-
-
This is awesome! Thank you for sharing!
-
you’re welcome!
-
-
Genius!
-
Thanks for sharing! I needed a black back drop to shoot a portrait but was on a budget so I used “landscaping fabrics” that was left over from my yard work. It worked! Check it out on my Instagram feed if you have time! Thx again and always looking forward to your blog!
-
This is a really great post! Thanks for sharing, Beth!
-
thank you, alina! you are very welcome! have a wonderful weekend!
-
-
Great post! Thank you for sharing. I struggle with finding backdrops at home that also are near good lighting. I love the idea of a portable backdrop and affordable!
-
enjoyed reading this! Thank you for the tips! I look forward to experimenting!
-
Brilliant! I love Ikea as well. Never thought of this but the possibilities seem endless! Thanks for sharing!
-
Um, I know what I’m grabbing next time I’m at Target. Thanks for sharing!
Best,
Josh – The Kentucky Gent
http://thekentuckygent.com-
yay! you’re very welcome! happy shopping!
-
-
Love all your posts. This one in particular is exactly what I needed to read! I struggle with backdrops and light. Will you do a post on how you do your self portraits too? That would be awesome! Thanks for sharing:)
-
Great idea with the tri fold, I used to work at hobby lobby so I would see people buy those all the time! Thanks for taking the time to share it’s been very helpful!
-
thanks so much, shawna! yes, crafts stores are great for inspiration!
-
-
Love following your blog and #thebethadillychallenge. You’re an inspiration!
-
thank you so much! so happy to have you here, reading along and participating in #thebethadillychallenge! glad you are enjoying it!
-
-
Great tips, thanks for sharing! The white foam boards that you can buy at an office supply store work great as reflectors and backgrounds. Dirt cheap too!
(Sorry if this is a repeat post, I tried posting with Yahoo but I’m not sure it worked)
-
thanks so much, jon! glad you enjoyed the tips! and, no worries, your post wasn’t repeated! thanks for the comment!
-
-
Hi beth! This is so great…love this post. I’ve always wondered how your set up looked like. I’m actually wanting to work on this more. Thanks for sharing. 😉
-
you’re welcome! glad you enjoyed the post, jessica!
-
-
[…] in case you missed it, i wrote a post about what backdrops i use and i am sharing some pullbacks of my photos! check it out + […]
-
Which cutting board did you get? Thanks!
-
oh gosh, I can’t remember. I don’t remember there being a lot of options, I just bought the wooden one at Ikea. 🙂
-

i love sharing my photography on instagram, it is such a happy community with so much inspirational talent! as i begin + host my second 365 photography project that follows along with >>the bethadilly challenge<<, i have challenged myself to only use my dslr when taking my daily photos. one of the most common questions…
-
So helpful, thank you! PS- I bought the same towel at Target and used it as a prop last week 😛
-
you are very welcome! so glad you enjoyed it, jennifer!
-
-
I loved this. Thanks for putting it all together, so easy to follow!
-
thank you and you are very welcome! happy to hear it was easy to follow along!
-
-
This might be a silly question, but what program did you use to create the video?
-
i used studio edition of iShowU. 🙂
-
-
Great video… I followed along and with the steps and successfully uploaded a pic to instagram… Keep the videos coming!
-
yay! glad you have already had success with the tutorial! way to go!
-
-
love the tutorial. i learn so much better watching someone than trying to read their flow. look forward to many more tutorials! 🙂
-
Love it can’t wait to see more! But i was wondering…how did you get your name in the corner of LR?
-
Thanks for the tutorial! What settings do you use when you export for Instagram?
-
Thank you for this! I downloaded pic tap go because I love how your photos float on your IG.
-
yay! you will love that app!
-
-
Nice video- but I don’t understand why you don’t just export directly to your dropbox folder instead of desktop and then dragging the file. I’ve exported directly to dropbox from Lightroom. Does it make a difference?
-
no, it does not make a difference where you export to. i export my photos to my desktop because i upload them to other social media sites as well, such as facebook and my personal blog so my desktop is a more central location. this is what works for me and my workflow, so feel free to do what works for you! 🙂
-
-
I love it! Great job with the video and the tutorial! It was very easy to understand. 🙂 I can’t wait for more!!
-
Thanks Beth. Great tutorial. While I understand your resolution is 300 ppi, what are your image dimensions that you upload to Instagram?
-
Love it!! Thank you for sharing. I pretty much followed the same flow but you had a couple of steps that would my flow a little quicker and smoother. I was adding my watermark with LR but find that doing it PS has more flexibility and isn’t that difficult at all. Thank you again. Can’t wait until the next. By any chance will you be sharing your workflow when editing for clients? Just curious?
-
Have you ever tried/thought about saving your watermark as a brush in Photoshop? Maybe I’m just extra lazy, but I feel like it might get tedious to retype your business name on every photo you want to use.
-
i actually just learned how to do that so i will have to create my new watermark stamp! 😉
-
-
Beth – This was very helpful!! But my edited photo doesn’t show up back in Lightroom. I’m jut learning LR, so I’ll have to figure that out. But adding the watermark in Photoshop is much more flexible!! Thank you!
-
hello dawn! are you starting with a photo in lightroom, then moving it to photoshop through lightroom, and clicking save once you are done? if you click “save as” in photoshop, i know it will let you save the photo in another location, such as your desktop, but just clicking “save” should place it right back into lightroom i believe! happy that the watermark is at least working well for you!
-
Thanks Beth! I did figure it out today and it is much better. I use PS Elements so there were a couple of options when I save that I had to learn – it creates & saves a .tff file and when I just go with that it puts the watermarked image back in LR. Not being really familiar with either LR or PS, it’s a challenge. I’m looking forward to more video tutorials!
-
oh, yay! i am so happy that it is working for you! if you need some help with photoshop and lightroom, definitely check out this post i wrote. http://bethadilly.com/how-to-learn-lightroom-photoshop/ i bought some “classroom in a books” for the software and it really really helped me understand the software and navigate it confidently!
-
-
-
-
[…] have been hidden behind my computer + microphone working on creating + recording my very first ever photography tutorial! […]
-
Thank you! Thank you! Thank you! I started my first 365 this year but I was also challenging myself to use my DSLR more and had no idea how to share them. Honestly, I got very frustrated about 2 weeks ago and gave up but now I feel like I can start again! You rock!
-
Thanks for telling me about pictapgo. I want to export rectangular images.
-
Hi Beth, thanks for every trick you show! I really appreciate. I saw you use Dropbox, I use it too. I wonder if this happen to you too… When I open a raw file from Dropbox, the photo opens automatically in Photoshop. What if I want my raw file in Lightroom? How do you handle this situation? Thank you very much!! ps. I’m sorry for my english, I hope you understand…I’m italian!
-
hello arianna! glad you enjoyed the tutorial! i actually haven’t opened photos from dropbox, i import them RAW from my memory card right into Lightroom. i wonder if you go into Lightroom first, select the import button, and then select the image from your DropBox folder if that would work better for you! hope this helps!
-
It works Beth! Thank you very much! You’re really a kind person..
-
Yay! I am so glad to hear that worked for you!
-
-
-
-
[…] to see learn more about how to post your dslr photos to instagram, check out my video about how to transfer your dslr photos quickly to instagram. […]
-
Hi! I was curious why you choose to edit in lightroom instead of Photoshop? Is it just easier, preference? What do you use Photoshop for? (I have PS and was curious if I should try lr) 🙂 Thank you!
-
hello kacie! i just honestly think that lightroom is better than photoshop and it works for me and my editing workflow. i use photoshop only for adding watermarks in specific areas and for creating images with text, but otherwise don’t use it at all. lightroom was a game changer for me, i love it!
-
-
Thank you for the tips it really helpful and useful. Keep it up!
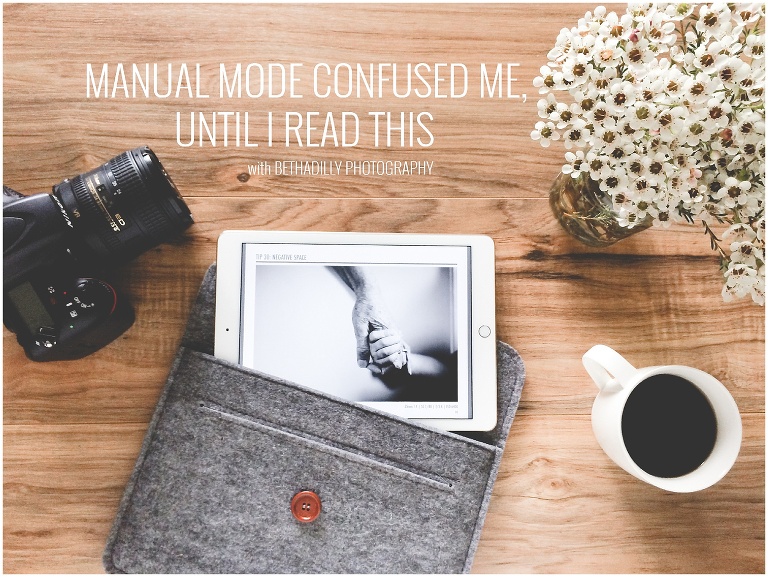
when i started my journey with photography, i wanted to learn everything i could about my camera. most importantly i wanted to learn manual mode. i bought books, i took classes and everything made me go cross-eyed. i was so new to all the photography terms and nothing was making any sense. so i decided…
-
Thanks for this article I bought this book over a year ago not much of a book person but you sound a lot like me, can’t wait to read and grow. My babies are puppies too! Thanks for the kick start to get Courtney’s book out
-
I had the exact same experience! I recommend it to everyone!
-
My child is now 21, so I don’t have children to practice with. Do you think this would be helpful for me?
-
This ebook was really the starting point of learning my camera and manual mode last year. I haven’t looked back – 100% attribute the excitement I have for my newfound passion to Courtney!! Highly recommend to everyone – with kids or not!
-
yes, exactly!!
-
-
Always an inspiration! Once I learned how to use Manual Mode, everything made so much sense. I am going on 4 years! My boys are off to college and are not home often. I look to nature, my dog and road trips for inspiration. And when my boys come home, I ambush them. I also take tons of photos of them playing lacrosse. 🙂 Thank you for the wonderful inspiration. XO
-
I have been a professional photographer for a year and a half. I love what I do and being a part of special moments, meeting new people and watching littles grow up. I would be embrassed when season photographers would talk to me about manual and I had no clue how to answer them. It sometimes made me second guess if this was for me. I know it is though because I get anxious when a couple days go by and I have not picked up my camera. Thank you so much for sharing this! 🙂
-
I bought this late last night and still haven’t received it
-
Just ordered! It has been on my list for awhile and your post convinced me to get it. Can’t wait to spend the long weekend reading! Thank you for the rec 🙂
-
I have been wanting this ebook for a while now. I am like you, all the info I have read about M mode just never stuck. I will say that I have put my camera on manual mode a while ago and haven’t taken it off but my pics don’t always come out the way I intended. I am always so inspired by you. Thank you for sharing.
-
Courtney also helped me get manual mode with a post on her blog. Now I start in Manual & change if I can’t figure out how to get the results I want. But am no longer afraid of it.
-
yay, dawn! that is so awesome!
-
-
Thanks for the recommendation. I’ll definitely check it out. Early this year, I promised myself I would stop using my DSLR as a point-and-shoot, but so far, I’ve only ventured into aperture mode. This ebook sounds like just the thing to get me started on manual 🙂
-
you will adore this book, helen! definitely go check it out! i love aperture mode, it was a great first step for me before going full manual!
-
-
[…] was a photo that was chosen and featured by a photography forum or the very first photo i took in manual mode, my photos tend to hold a special memory. using double sided tape, i placed my photos, one by one […]
-
Just finished the unexpected everyday and you just confirmed the value I thought I found
-
oh yay, cindy! i am so glad that you enjoyed that book! so happy for you!
-
-
[…] 4. the unexpected everyday eBook i would have never understood manual mode if it wasn’t for this eBook. after years of struggling with the concept of photographing in M, i finally purchased this eBook and learned manual mode within days! yes, days! to read even more about what amazing things this eBook taught me about photography, check out my post about the unexpected everyday. […]
-
[…] completing a 365 photography project was the best thing that i ever did for my photography. it taught me how to see my everyday in an interesting way and how to portray my life through the lens of my camera. even better, completing a 365 photography project helped me build my camera skill in ways that i never thought possible. instead of fumbling with my camera and guessing what settings to choose, i learned how to become confident behind the lens and master manual mode. […]
-
I just downloaded this book! I’m doing The Bethadilly Challenge and hope that this gives me the boost and inspiration that I need to be better at the end of the year… not to mention that I, too, have a little one on the way! This is perfect. Thanks!
-
I was skeptical about how helpful this book would actually be, but I am only one chapter in and I learned so much!! Thank you so much for recommending it!
-
yay well now you DO have a kid to practice on!! she’s a doll, congrats!! hope you guys are doing well!!!!<3 <3 <3
-
yes, sure do! 🙂 thank you!
-
-
[…] kids is a great motivation for you to finally learn manual mode! be sure to check out my post, Manual Mode Confused Me Until I Read This, to learn how i finally conquered M […]
-
[…] are you struggling with manual mode? then you must read one of my most popular posts about how i finally conquered manual mode. […]
-
[…] time to finally learn manual mode and get the pictures your want, even in low light! check out how i finally conquered manual mode to inspire your camera skill this […]
-
[…] are you struggling with manual mode? be sure to check out how i finally conquered manual mode. […]
-
[…] there’s no better time than the new year to finally conquer manual mode. i put off learning manual mode for a long time and manual mode confused me, until i read this. […]
-
[…] to see how i finally learned manual mode, be sure to read manual mode confused me, until i read this. […]
-
[…] for more help on how to learn manual mode, check out my post manual mode confused me, until i read this. […]
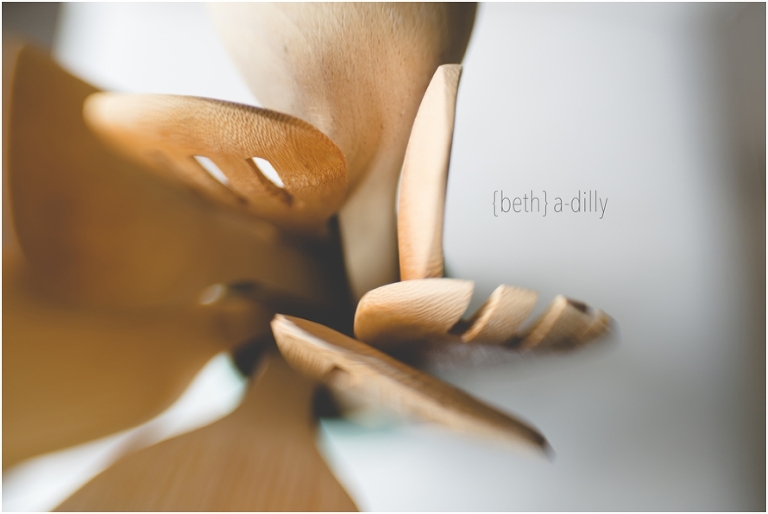
when my lensbaby first arrived in the mail, it was such a happy mail day! i was so excited to start taking beautiful photographs and immediately put it on my camera. i started taking photo after photo and i felt like i was living a little photographer dream! but when i uploaded my first photo…
-
love this article! i just got my lensbaby spark and took it outside to play. I noticed that like you once I uploaded them into LR some I was disappointed in but others I was totally in love with. I definitely need to practice with it more. Thanks for the share!
-
yes, it definitely takes some practice! but it is so worth the time because the images are so fun!! how do you like the spark?
-
-
I want to love my Sweet 35 – I do ~ I do. I just can’t nail focus. All the images are soft. My “starts with P” IG post yesterday was with that lens and and I think I used a fill 4gb card to get 1 image 🙁 I’m trying not to put it bag in my bag for another year, but don’t know if I’ll make it. Attempting to use it again today for the “pink” post. Beautiful images, as always. Thanks for posting! Shine On & Shine Bright ~ Andrea
-
Wow! I’ve never heard to Lensbaby before! The pictures turn out so dreamy…I’m definitely going to be checking it out.
-
yes, you should definitely check it out mallory! they are really fun lenses and you can get really creative with them! have fun!
-
-
I have the composer pro and with it I got some free accessories, soft focus lens, macro, etc. but I do not have the Sweet 35. Do I need to have the Sweet 35 “attachment” with my composer pro, is that why I am having such difficulty. The lens baby website wasn’t that helpful, or at least I couldn’t figure out how to make it helpful! Help!
-
hello julie, i am not sure i can be of much help, only to refer you to the videos on the lensbaby site that i find to be helpful walking you through how to use the lenses. i am not familiar with those accessories. i have the lensbaby composer pro sweet 35 and i just purchased the micro converter.
-
-
I just received my Composer Pro Sweet 35 and although my first shots were definitely off focus, I can still tell that I will eventually love this fun lens. I have lots of practice ahead of me, but your tips are sure to help. Thank you.
-
yay, Rosie! so excited for you and your new lens! it definitely takes a little practice in the beginning, but the images are soooo worth it! have fun!
-
-
My husband just ordered the Lensbaby with an adaptor ring (he shoots Nikon, I shoot Canon). We can’t wait for it to arrive! Thanks for this post, I’m going to share it with him.
-
awe, that is so awesome! enjoy your new lensbaby! so happy that you found this post helpful! also, i love the fact that you are a canon user and your husband is a nikon user! ha ha, that is awesome!
-
-
Great post! Just got this exact lens and was having a hard time…I so appreciate your tips and tricks! Thank you 🙂
-
you’re welcome! enjoy your lens!
-
-
Love, love this post. It has kept my self esteem in good shape after my first attempt with the lens baby. Thank you so much. Love what you have achieved with the lens !
-
You are so welcome, Jenny! Glad this post has inspired you to be patient with your lensbaby, it is certainly a challenge to master…but so worth it!
-
Caroline - I love this and I spy some smash book washi tape that I also have sat on my desk 🙂
{beth} a-dilly - thank you! and, yes i love washi tape! it is so much fun to use! <3
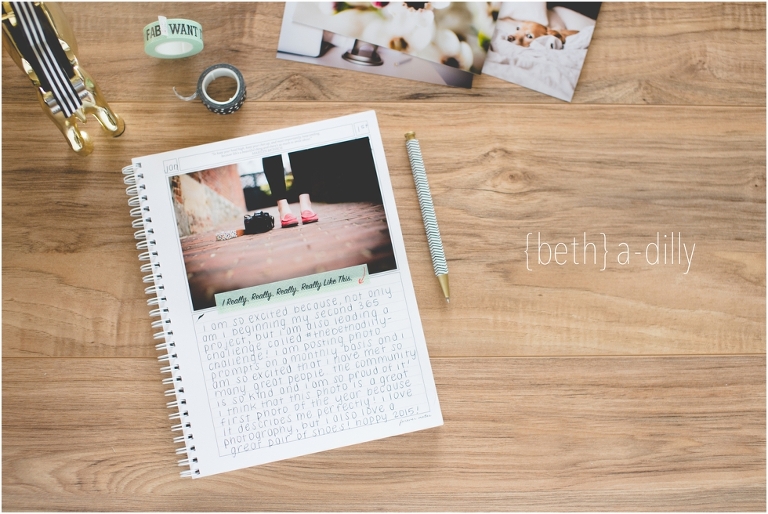
Suzie Evans Horton - I absolutely LOVE this, Beth! What a wonderful project. I truly need to get moving on printing more photos. So silly that I look at my phone or my computer to enjoy them. I, too, love quotes. I have hundreds that i love. I often make new photos with them using an app on my phone. Thank you, once again, for being my inspiration. Everything about your blog and your photography is beautiful and motivational. Have a wonderful, creative day! XO
Michaela Chaconas Ristaino - Um, your handwriting is ridiculously perfect and beautiful. So happy to be on #thebethadilly challenge! You are such and inspiration and I can’t believe I’ve made it this far! Day 59 and going strong! I love the daily prompts and having the support of the whole thebethadillychallenge community! You are the bomb, Beth!
Phyllis - Beth, love this journal! Quick question though, are these pages acid-free? I’m looking for a journal I can document and be preserved for a very long time.
{beth} a-dilly - hello phyllis! great question, but i am not sure of the answer! here a link to the journal so you can get some more information about it! http://www.marissa-lynn.com/product/forever-notes-highlight-journal/ have a wonderful weekend!
Kari Ganske - I was fortunate enough that the hubs picked up on my hints around Christmas time and I am now the proud owner of one of these journals. Like you said, it is the perfect mix of pictures and words (both of which I love!). An added bonus is my kids really enjoy picking it up and looking through it to remember all our memories from the year, too. I know it will be a keepsake. Okay – enough commercial. 🙂
{beth} a-dilly - awe, i totally agree with you kari! and that is so great that your kids love to look through it! that is so special! you might need one for each kiddo now! ha ha! hint, hint hubby! 😉
Victoria - Hi! Just curious, where do you print your photos for this journal? And do you really print one everyday!?
{beth} a-dilly - for this journal, i have printed locally! and, no i do not print every day for this journal, just every once in awhile! i like to print and journal about milestones throughout the year or just little moments/photos that i particularly am proud of!