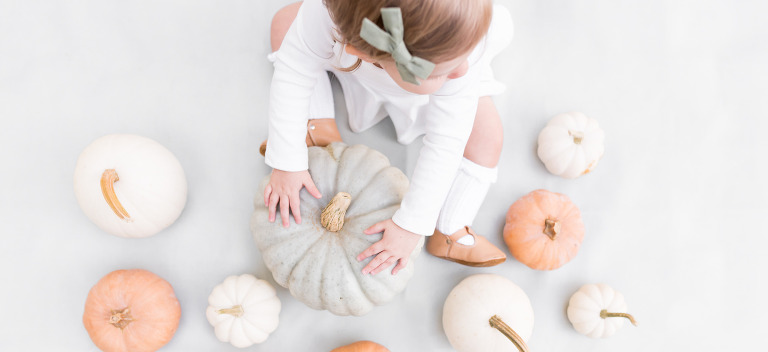
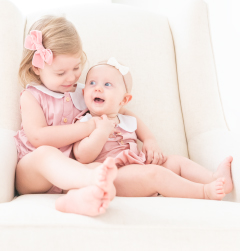
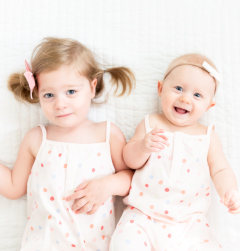
it was important for me to get in front of the camera this week, as it serves as my twenties finale. today i turn thirty, an age that always seemed so far into the distance. if you would ask me, i would say i feel like i am twenty-four. while i embrace thirty, it just doesn’t seem possible that it’s my turn to graduate into my thirties.
this post contains affiliate links. thank you in advance for supporting bethadilly photography.
my mother called me last night, as she does every year the night before my birthday. she starts off the call with “30 years ago today” and then tells me our famous story of how she went into labor and met me for the first time. it’s a story that is cherished by my entire family, everything from my father timing her contractions on the stop clock of the final 4 tournament on tv (much to my mother’s annoyance) to my father being a baby hog in the hospital the day i was born. what can i say, it was his turn to hold me! every year my parents retell that story to me and it not only makes me smile, but as a new mother this year it makes me want to do the same thing for our little girl. to each year tell her the beautiful story of that april day when we became parents.
this year will be my first birthday as a mama and i felt it important to get in front of the frame to document what i looked like at thirty. so far, i like thirty. i took a series of images of my daughter and i together, this being one of my favorites. i set up this photo with my nikon d750 and tripod, using a wide angle lens to include the surroundings within the frame as well. it is important for me to include my surroundings within the frame to document not only me and my daughter at thirty, but what my design choice in my home is like at the time. as a photographer who is passionate about documentary photography, it important for me to document even the little things, for they may seem like big things someday.
so this image serves as my twenties finale. the end of a new chapter and the beginning of another. but this chapter is so beautiful! my husband asked me if i got everything i wanted out of my twenties and to that i said, “i achieved things i never even dreamed of and accomplished things i didn’t know i was capable of.” so on that note, look out thirties! i have big plans for you. my twenties taught me that i am strong and determined; i will not be slowed down and will make the most out of life.
need help seeing the beauty in your home? be sure to read my eBook the everyday photograph to inspire your everyday photography.
My Twenties Finale by Bethany Deschamp
.jpg)
this photo was achieved using : nikon d750, sigma art 24mm f/1.4 lens, and tripod.
my settings were : ISO 640 | f/2.8 | 1/80ss
. . .
to learn more about how to create emotion in your images, be sure to read 4 eye-catching ways to create emotion in photographs.
be sure to join my exclusive email list to receive my latest photography tips and tutorials. it’s free!
need some photography tips + inspiration? check out what posts are trending below!
it is not in my nature to break rules. i have spent all of my life being a rule follower, never doing anything that i knew was wrong. it’s just my personality to only do things the right way. after years of studying every photography rule i know and mastering those rules, i find that photography is the one thing in my life that i like to rebel with. and from time to time, breaking photography rules has allowed me to create some of my strongest and most compelling images. as i pick up my camera and think through my photo, here are 5 rules that i love to beautifully break every once in awhile.
need help figuring out how to beautifully photograph the simple moments of your everyday? be sure to check out my new ebook, the everyday photograph.
this post contains affiliate links. thank you in advance for supporting bethadilly photography.
Breaking Photography Rules : 5 Rules I Love To Beautifully Break
.jpg)
first of all, i think it is very important for one to know and understand photography rules before breaking them. there is a different in breaking photography rules intentionally and breaking photography rules because you don’t know about them. take the time to master the rules of photography before you decide which ones to break.
.jpg)
1. Limb Chops
i am very hyperaware of limbs within the frame. very rarely will i ever chop off a finger, leg or toe. and if i do, i delete the photo because it is something that i simply cannot look past and it bothers me way too much. but i love to crop a head out of the frame, often. when a subject’s eyes are within the frame, the viewer is immediately drawn to their eyes. but sometimes, the eyes are not where i want the viewer to focus. in the image above, i purposefully cropped her eyes out of the frame because i wanted the viewer to focus on the action: nibbling on her storybook.
.jpg)
2. Blowing Highlights
i love blowing windows. there is something so beautifully about a blown window and, depending on the mood of the photo, it is something that i do regularly. when blowing highlights, i never want blown highlights on my subject. i am sure to monitor my highlights in lightroom so i can ensure that the highlights on my subject are in the proper range. for example, in the image above i was okay with blowing highlights on the window but i was careful to monitor the highlights on the baby’s sweater and my white pants to ensure that they were not blown.
need help monitoring your highlights? be sure to check out my post on clipping blacks and blowing highlights.
.jpg)
3. Center Compositions
while i understand the appeal and importance of the rule of thirds, some photographs beg for a center composition. there are times when i really love the idea of placing my subject right in the middle of the frame and feel that it makes for a stronger image. it can also help to create a sense of balance within the image.
.jpg)
4. Placing My Subject On The Left
because we read images like we read a book, from left to right, it is often better to place your subject on the right side of the frame so your viewer’s eye ends on your subject instead of on blank space. it is a rule that creates harmony for the viewer. however, from time to time, i like to place my subject on the left side of the frame. in the photo above, my daughter is on the left side of the frame, with a pile of sweet friends sitting on the right side. because the right side of the frame wasn’t blank or empty, i was okay with the composition.
.jpg)
5. Intentional Out Of Focus
i love to switch my lens to manual focus every once in awhile and intentionally create an out of focus image. while sharp and crisp focus is a photography skill to master, there is also something so beautiful about an out of focus image. however, there is a different between missing focus and intentionally being out of focus.
intentionally breaking photography rules can be really fun. again, it is really important that you take the time to understand the importance of photography rules and why they visually work, before deciding to break them. it is one thing to break a rule because you feel it will create a better image and another thing to break a rule because you don’t even know about it. do you break rules with your photography? share what rules you like to break in the comment section below!
be sure to join my exclusive email list to receive my latest photography tips and tutorials. it’s free!
need some photography tips + inspiration? check out what posts are trending below!
as we enter week 13 of the bethadilly 52, i realize that we are 1/4 of the way through this project! 13 photos down, 39 more to go. this week our photography concept is balance. when i noticed our dog sitting ever so sweetly under our daughter’s high chair as she ate dinner, i couldn’t help but grab my camera to document this moment. he often does this, as a way of half adoring her and half begging her for a little bit of something, anything. because this moment between our baby and dog was so strong and i wanted to showcase it, i put a lot of thought into my composition. when deciding what angle to photograph it from, i wanted to minimize the surroundings of our dining room and focus solely on them. i decided to create balance in this image by framing them in the doorway that leads to our kitchen. by framing them this way, i am allowing negative blank space to surround them with the fridge on the left and the wall on the right. by doing this, i am bringing the viewer’s eye right to the subjects. i also created balance with light, by showcasing my subjects in a brighter area and allowing the surrounding framed areas to fall to shadow. having a good balance between light and shadow creates a very effective image.
to join in on The Bethadilly 52, where we take one photo a week using the hashtag #thebethadilly52 on instagram, check out the prompt list.
this post contains affiliate links. thank you in advance for supporting bethadilly photography.
The Bethadilly 52 Week 13 – Balance
.jpg)
this photo was achieved using : nikon d750, sigma art 24mm f/1.4 lens.
my settings were : ISO 500 | f/2.8 | 1/60ss
. . .
to learn more about balance, be sure to read 5 secrets to creating visual balance.
be sure to join my exclusive email list to receive my latest photography tips and tutorials. it’s free!
need some photography tips + inspiration? check out what posts are trending below!
ideally, when we create a photograph we want to preserve as much detail as we can. we do this by determining what detail is important to the story of our image, choose the appropriate settings to incorporate those details, and then take the photo. there are times, however, that we will clip the blacks or blow the highlights in our image. this means that our blacks are too dark and our whites and too bright, respectively. the blacks are so dark that we can no longer see detail and the whites are so bright that we are no longer seeing detail, in those areas of the frame. by monitoring our histogram we can begin to monitor where in the image we are blowing highlights and clipping blacks. once we know the areas of concern, we can then decide if we want to fix those areas or not.
are you trying to take better photos of your everyday, but feel stuck? be sure to check out my eBook the everyday photograph.
this post contains affiliate links. thank you in advance for supporting bethadilly photography.
Blowing Highlights and Clipping Blacks: The Rule Behind Lost Details
.jpg)
Checking For Blown Highlights
to quickly check for blown highlights in lightroom, you will refer to your histogram in the top right corner of the develop module. here, you will find two rectangles on the upper left and upper right of the histogram. if either triangles are white, you are being told that you are either blowing highlight or clipping blacks. the right triangle is where you will monitor your highlights. in the image below, you will see that the right triangle is white, indicating that i am blowing highlights. to see where the blown highlights are on my image, i simply click the white triangle and the areas of blown highlights will turn red on my image.
.png)
once i know where my blown highlights are, i can determine if i want to fix them or if i am okay with them being present. to fix blown highlights, you will mainly focus on the exposure, highlights, or whites sliders in lightroom. because the blown highlights within my image are on an area that is unimportant to me, i am fine with them being blown and choose to leave the image as is. if there were blown highlights on my subject’s skin or on an ares of more importance within the frame, i would certainly remedy the blown highlights. this image was taken on a snowy day, and i do like the idea of having a bright white window to portray that weather. also, the blown highlights in this image are on the sky that was already white because of the snow. i have preserved the white snow on the ground, which is the important area for me.
.jpg)
Checking For Clipped Blacks
to check for clipped blacks, you will refer to the same histogram in the develop module of lightroom. this time, you will refer to the triangle on the left to monitor clopped blacks. if the triangle is white on the left side of the histogram, you are being told that your blacks are being clipped within your image. by clicking that white triangle, you are turned on the blacks indicator and you will be shown the areas of clipped blacks with blue on your image.
.png)
now that you know where your clipped blacks are, you can decide if it is necessary to fix them or not. you will mainly focus on the blacks and shadows sliders when fixing clipped blacks. because the clipped blacks are in the shadows of my image, i am not worried about preserving detail in that area. in fact, i prefer that this area of the image is lost to shadow because it is hiding the additional cherrio crumbs that have fallen onto the highchair seat and i don’t need detail in that area to tell a better story in this image.
.jpg)
Checking For Blown Highlights and Clipped Blacks
you can certainly check to see if you are blowing highlights and clipping blacks at the same time by clicking both the blacks triangle and the highlights triangle on the top of your histogram in the develop module of lightroom. this will show you the clipped blacks in blue and the blown highlights in red.
.png)
because the blown highlights are so minor and not hiding important detail from my image, i choose to allow them to remain. i may even choose to blown them further, to hide the dappled information coming in from the window that may be distracting for the viewer. in regards to the blacks, i am also fine with where the clipped blacks are located because they aren’t hiding any relevant detail. as long as i don’t have clipped blacks or blown highlights on my subject or on an area of the frame that i need to tell my story, i am generally okay with their presence. of course, this is on a case by case basis and my main goal is always to create an image free of clipped blacks and blown highlights.
.jpg)
blowing highlights and clipping blacks naturally occurs within photography, but knowing how to monitor and fix those areas will help you to strengthen your image. there will be times when your clipped blacks or blown highlights will be preferred within an image and times when they will be ruining your image. by using the indicators in lightroom, you will be able to take control over those questionable areas and determine when and why you would rather fix or leave them as is. for me, when it comes to blowing highlights and clipping blacks, i am sure to avoid it entirely on my subjects and in areas of my frame that are relevant to my story.
be sure to join my exclusive email list to receive my latest photography tips and tutorials. it’s free!
need some photography tips + inspiration? check out what posts are trending below!
-
[…] need help monitoring your highlights? be sure to check out my post on clipping blacks and blowing highlights. […]
for many photographers, finding a photography style is the ultimate struggle. for me, i picked up my light, bright and airy photography style fairly early on in my photography journey and it was that style that helped my work become highly recognized in the early years. three years later, the style that used to drive me to pick up my camera was doing the opposite. it was suffocating me. i completely felt suffocated. i felt limited. i felt uninspired. i felt that every image i had to take needed to be light, bright and airy and i just wasn’t feeling it anymore. after much thought and bravery, i decided to go with my heart and change my style.
need help finding a photography style that is right for you? be sure to check out my eBook, the styled photographer.
this post contains affiliate links. thank you in advance for supporting bethadilly photography.
Finding A Photography Style : Why Changing My Style Saved My Photography
as photographers, i think we work so hard to identify our style and embrace it. we work so hard at becoming our style that, the moment we aren’t inspired by it, we feel that we can’t change. at least that was my thought. i kept telling myself bethany, you have spent years associating your style with your name, it’s what you are known for. you can’t change it all now! it was then that i began feeling trapped with my photography.
because my style was very light, bright and airy, i was limiting myself to shooting only during the brightest parts of the day and only incorporating specific creamy tones into my images. don’t get me wrong, those images were beautiful and images that i am still immensely happy with and proud of. but they were just taking so much work. i was having to think entirely too much. i was limiting myself to only photographing at certain times and with certain elements.
but what about all those other times that i wanted to photograph, but the light was darker or the tones weren’t bethadilly branded?
i just wouldn’t pick up my camera. and that’s when i knew something was just wrong with the whole situation.
having a photographing style should be a reflection of who you are. you should have a style for you and for nobody else. i started realizing that i was photographing my images for the sake of a style and for other people who liked my style, and not necessarily for myself anymore. i wanted to change so badly, but i didn’t feel like i could. until one day.
suddenly, i told myself who says you can’t change? who says you have to stay the same way forever? one of the things i am most passionate about is change and the process of evolving as i grow as a photographer. so wouldn’t that naturally happen the same way with my photography style?
it’s like a haircut. just because it looked great in the 80’s, doesn’t mean it looks great now.
times change. people change. styles change.
what i am trying to say here is that change is good. change is natural. and the moment you feel like you aren’t being true to yourself, it’s an obvious sign that change is needed. as we grow as photographers, we should be changing. if we aren’t changing, we aren’t getting better. if we are staying the same, we aren’t really learning. growth = change. and vice versa.
i am not saying that you can change your style every day. you can’t pick a style week to week, but instead you should embrace a style as a whole to strive for. remember, your goal should be consistency and changing too often will make your portfolio look unharmonious and confusing.
the main change i wanted to see with my photography was with how i was using light. using the brightest light possible just wasn’t working for me anymore. it was limiting me to only being able to pick up my camera during certain times of the day and it was making me miss other moments because the light wasn’t “good.” i wanted my new style to embrace the here and the now. to be able to take a great image that reflected me, no matter the light source.
from the moment i decided to be true to myself and allow myself to change with my photography, i began to pick up my camera more. i began seeing my life in a new way and feeling inspired to photograph again. changing photography styles truly saved my photography. it made me fall in love with photography all over again as i pour more and more of myself into my images.
and when you are happy with your photography, you are encouraged to pick up your camera. and when you pick up your camera, that’s when the magic happens. it all happens with finding a photography style that is true to you.
stay true to yourself. allow yourself to change. be happy with your work.
be sure to join my exclusive email list to receive my latest photography tips and tutorials. it’s free!
need some photography tips + inspiration? check out what posts are trending below!
-
Hmmm…very good question: Who says you can’t change? Even Picaso went through periods where his art looked quite distinct from other times. If he can do it, surely we can have that same freedom. Since I don’t yet have a style or genre to call my own, I get to enjoy trying new things all the time as I try to identify what feels most like “me.” It really is a lot of fun to explore new things! Even after I figure out and develop “my style,” I hope experimenting will always keep me fresh. Thanks for a great post and “permission” to explore outside the familiar.
P.S.–I do hear what you are saying about an identifiable style…and also about not putting limits on ourselves that squelch our passion for photography.-
Thank you, it’s so freeing to allow yourself to be creative!
-
-
I’m working on developing my style right now so this is so inspiring! What words would you use to describe your new style?


.jpg)
.jpg)