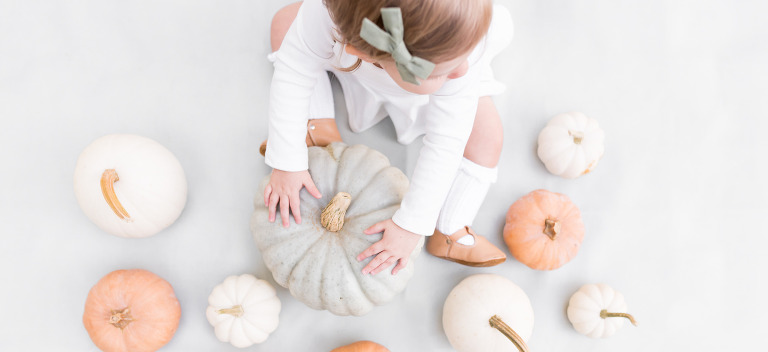
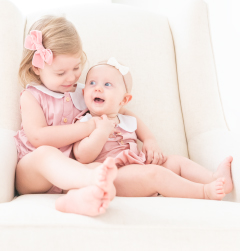
people always ask me how i market my photography business and i can tell you right now, i have never spent a penny on marketing. i like to save all my money for lenses and camera bags, and have found other ways to market my business very effectively…absolutely free. by blogging my sessions immediately after they are edited and always keeping my website current, my website shows potential clients that i am actively working and accepting clients. but there are some other things that i do to help promote my business that are super simple. in fact, they are so simple that my client does them for me. here are 3 easy ways your clients can promote your photography business, simply by promoting their gorgeous photos.
need to improve your photography website? here are 10 things your photography website needs to have.
3 Easy Ways Your Clients Can Promote Your Photography Business
.jpg)
1. Hit The “Share” Button
when i post sneak peeks for my clients on facebook, i encourage them to share the sneak peek with their friends and family by simply clicking the “share” button on the post. this allows my post to go into their newsfeed, which encourages their local friends and family to consider my business, should they be looking to get their photos done in the future. most people hire photographers whom their friends have used, so this is an easy way to introduce myself to my client’s friends and family.
.jpg)
2. Post Watermarked Images
when i deliver the final images to my clients, i give them images sized to print and images with my watermark on them. this is for a couple reasons. first, i like to provide a little added protection to my client images for sharing on social media. i encourage my clients to post watermarked images publicly, just as an added safety from theft. of course, this isn’t mandatory just recommended and most, if not all, my clients do this. while i solely do this for protective reasons, this also serves as another way for other people to learn about my business, as my name is on the shared image. of the 3 easy ways your clients can promote your photography business, this one is so simple and effective.
.jpg)
3. Offer A Referral Incentive
for clients who actively refer your photography business to their friends and family, it is always kind to offer them an incentive to do so. this can be as simple as telling them they will receive a discount on their next session if they refer a certain number of families to you. remember, it is always kind to show your appreciation to the clients who support your business.
while there are so many ways you can market your photography business, these are 3 easy ways your clients can promote your photography business for you. and even better, it doesn’t cost you anything. what other ways have you been successful with marketing your photography business? do your clients help you? be sure to share your tips with us in the comment section below.
be sure to join my exclusive email list to receive my latest photography tips and tutorials. it’s free!
need some photography tips + inspiration? check out what posts are trending below!
.jpg)
before booking a photography client, it is really important that you are certain they are the right fit for you. it’s important and fair to both parties that the photographer is a good fit for the client. why? it’s important that the photographer is passionate about the work they are doing in order to create really successful images. it is also important that the client knows what work they are hiring out so they know what to expect in their final photos. having a strong and cohesive portfolio is the first step to ensuring that you are booking the right clients for you, as the clients who are drawn to your work will be the clients who eventually email you to book a session. i don’t send a questionnaire or anything formal beforehand to learn more about my client, but there are a few things i do want to know before booking. as you are speaking to potential clients, here are 6 questions to ask your photography client before booking them.
need help deciding what to pack for your session? here is a list of my game changing photography gear that i bring to my sessions.
6 Questions To Ask Your Photography Client Before Booking Them
.jpg)
1. Ensure That They’ve Seen Your Portfolio
the biggest sign that my client is right for me is if they have seen my portfolio. more often than not, this is made apparent in their inquiry email as my potential clients usually start off an email with, “i love your natural photos and candid approach,” or “i really love your lifestyle work.” if emails are started off like that, i know the client understands my vision and is a good fit. if i need to make sure they have seen my work, i will reply to their inquiry with some potential date options and a simple, “here is a link to my portfolio, just in case you need to become familiar with my style of photography. you will see that i am very candid and create natural images, rarely having my clients look at the camera.”
ensuring that your client has seen your portfolio is critical. this ensures that both you and your client will be happy because you are creating the images that you are passionate about and your client is paying for images that they want.
.jpg)
2. Date and Location
before booking my clients, i want a firm date and location picked. i don’t take a deposit or hold a date without knowing an exact date and time. of course, with newborn clients this does have the potential to change, should a baby arrive early or late. but for my family clients, the date we pick is firm and because i have them place a deposit, i never have clients cancel and only reschedule for weather.
for newborn clients, i photograph their session in their home so i confirm their address before booking. (more importantly, to ensure that they are within driving distance). for family clients who want an outdoor session, i confirm a specific location that we agree upon before booking.
.jpg)
3. Session Attendees
again, this is something that is usually obvious in the inquiry email as clients usually say, “my husband and i are expecting our first (or second) baby,” or “we are a family of four looking to schedule a family session.” if i am not sure of who will be attending the session, i simply ask my client before booking. i also like to ask ages of children, as it is helpful when thinking of locations and photos to prepare for. some locations may be a better fit for younger children versus older children, but ages are as specific as i get before booking.
.jpg)
4. Time of Day
just like i want to confirm a date and location before booking, i also like to confirm a time of day. this helps me when booking additional clients for the same day, allowing me to know what additional time spots are still available. for newborn clients, i have them watch the light in their home to determine what time of day it is naturally the brightest in their home. for outdoor clients, i recommend and usually pick the time of day to schedule, based on my experience with the light at the given location. this could be one of your most important questions to ask your photography client before booking them because you may need to be aware of child schedules when it comes to naps or other activities that could conflict with the success of your session.
.jpg)
5. Must Have Photos
one of the most important questions to ask your photography client before booking them is if they have any must have photos. this is another great way to ensure that you are booking the right client for you. most of the time, my clients say no and they allow me to just do my thing and create a collection for them. every once in awhile, a client will ask for a close up of their child or a photo of their husband with their children and it’s important that i know this in order to keep my client happy. sometimes clients have an idea for a holiday or birth card and it’s important that you know that upfront.
.jpg)
6. Wardrobe Help
the final question i ask my client before booking is if they need any help with wardrobe. most of my clients are drawn to my photography because it is soft and airy, so helping them pick soft neutrals will ensure that we are creating the look that i am known for and that they were initially drawn to. this can be as simple as sending them a pinterest board of wardrobe inspiration to help with color coordination and ideal tones.
be sure to keep these questions in mind when you are thinking of questions to ask your photography client before booking them. if it makes you more comfortable to ask more, ask more! for me, these are the only questions i need answered before knowing that my client is a good fit for me. while other photographers really like to know more about their families and their hobbies, i just don’t feel that it makes my sessions any better and it takes a lot of time for the client. every photographer is comfortable with their booking routine, and this is all the questions i ask before booking.
check out my latest ebook, the everyday photograph. it’s a guide to seeing the beauty of your everyday!
be sure to join my exclusive email list to receive my latest photography tips and tutorials. it’s free!
need some photography tips + inspiration? check out what posts are trending below!
.jpg)
one of my favorite things to capture within the frame is a reflection. it is something that i find to be a beautiful surprise and is an element that not only adds depth to an image, but it adds a great sense of balance. photographing reflections is something that is really easy to do, but you have to be mindful about where you place your camera and what angle you photograph from to be successful with it. if you notice an opportunity to photograph a reflection of some sort, be sure to keep the following 3 key tips in mind to help you successfully incorporate a reflection into your image.
need help seeing the beauty in your everyday? be sure to read the everyday photograph.
this post contains affiliate links. thank you in advance for supporting bethadilly photography.
Photographing Reflections: 3 Key Tips For Capturing Reflections Within Photos
.jpg)
1. Get Low
reflections can often be found on shiny surfaces such as granite countertops, mirrors, windows, a body of water, etc. in the photo above, i noticed an opportunity to photograph a reflection of my little girl being reflected in the countertop in our kitchen. the key to photographing a balanced reflection is to get low with your camera. for the image above, i set my camera on the countertop to take this photo, allowing both my daughter and the countertop to equally take up the frame and, therefore, capture her reflection as well.
to learn more about getting into the frame with your kids, be sure to read my guide to self portraits for tips on how to take self portraits with a dslr.
.jpg)
2. Look For Darker Backgrounds
if you are trying to capture a reflection straight on, look for darker backgrounds so your reflection pops and can be seen easily. for the image above, i wanted to photograph the reflection of my friends and i in a window. it took a few tries but, after finding a window with a darker curtain background, i was able to photograph a reflection where you could actually see us.
.jpg)
3. Back Up
just like you got low to capture your reflection, make sure you also back up. backing up with ensure that you photograph your entire reflection and don’t cut it off. make sure you are composing for your object and it’s entire reflection as well. backing up will help you ensure that you are photographing the entire object and reflection. it’s important that you photograph the entire reflection because it can be confusing to your viewer to chop off what is being reflected. in the image above, i backed up to make sure that i captured the entire reflection of the lens on the glass table.
photographing reflections is really fun and is something that is very addicting, once you get the hang of it. challenge yourself to look for reflective surfaces and reflection opportunities as you go about your everyday. once you find an opportunity to capture a reflection, be sure to back up, get low and consider a darker background if photographing head on.
check out my latest ebook, the everyday photograph. it’s a guide to seeing the beauty of your everyday!
be sure to join my exclusive email list to receive my latest photography tips and tutorials. it’s free!
need some photography tips + inspiration? check out what posts are trending below!
.jpg)
one of my favorite ways to create a compelling image is through use of creative blur. whether i am blurring my entire image, or just blurring sections within the background or foreground, i love using creative blur as a way of drawing my viewer’s eye to my intended subject.
need help seeing the beauty in your everyday? be sure to read the everyday photograph.
this post contains affiliate links. thank you in advance for supporting bethadilly photography.
one of the key ways to accomplishing creative blur is through the use of a wide aperture . i typically use an aperture of f/2.8 or lower to create soft blur within my images. remember, the higher your aperture number such as f/16, more of your image will be in focus. the lower your aperture number such as f/3.5 or lower, less of your image will be in focus.
Creative Blur: 3 Effective Ways To Create Blur Within Photographs
.jpg)
Manual Focus
from time to time, i like to switch my lens to manual focus and play around with creative blur that way. in the image above of the traffic scene, i intentionally turned the focus ring on my lens to make the entire image out of focus. by doing this, i placed a creative blur over the entire image. this can be effective when you want to intentionally create a blurry image, which can be very beautiful if done in a way that doesn’t confuse your viewer. if you want to blur your entire image, you may want to play around with your focus ring and blur only enough that still allows your viewer to visually understand your scene.
.jpg)
Blur Out Distractions
one of the best parts about using creative blur is that it allows you to photograph in crowded areas, without creating a visually “crowded” photograph. in the photo above, i was visiting a cupcake shop that was extremely crowded. by using an aperture of f/2.8 and placing my focal point closer to my foreground (away from the crowd in the background) i was able to create a soft blur over the distant distractions of the people and the store walls. because i am blurring out the elements that i find to be visually distracting, i am allowing the focus to stay where i want it: on the cupcakes.
.jpg)
Use Single Point Focus
while you will want to check with your camera manual to review what focus modes your camera has, i set my nikon d750 to single point focus. this allows me to move my focal point around and place it on a specific point within the frame. this helps when creating creative blur because i can place my focal point within the foreground, middle, or background of the image and have that focal plane be the only area in focus. depending on what aperture i use, this allows all other focal planes to fall out of focus. in the image above, i was using an aperture of f/1.4 on my wide angle lens and placed the focal point in the foreground, on my knee, allowing the background to fall out of focus.
using creative blur can help create stronger images as you showcase your subject and allow it’s surroundings to fall out of focus. this can also simply just be beautiful. because our eye technically places focus on our focal point and blurs the surroundings, we are essentially creating realistic photos of how one sees the world when we are using creative blur.
check out my latest ebook, the everyday photograph. it’s a guide to seeing the beauty of your everyday!
be sure to join my exclusive email list to receive my latest photography tips and tutorials. it’s free!
need some photography tips + inspiration? check out what posts are trending below!
.jpg)
when it comes to composing a photo, using negative space is something i have done for so long that i no longer realize that i am doing it. negative space is when you purposefully leave blank space within your frame and it is defined as the space that surrounds your subject. instead of filling your frame with your subject, you place your subject in one part of your frame and balance it out with blank space. this is a very thoughtful way of composing an image and showcasing your subject.
need help seeing the beauty in your everyday? be sure to read the everyday photograph.
this post contains affiliate links. thank you in advance for supporting bethadilly photography.
Negative Space : Why Blank Space Can Be Thoughtful
.jpg)
Your Subject Is Obvious
using negative space allows your subject to be showcased quite obviously. in the photo above, i placed the carton of eggs in the top third of the frame and filled the remaining two thirds of the frame with negative space. through the blank space and the leading lines of the table, i am guiding the viewer’s eye right to my subject: the eggs.
.jpg)
Offers A Sense of Balance
when using negative space, you are offering a sense of balance within your photo. with this composition, you are balancing out your subject with blank space. when using this composition, you may find it helpful to remember that less is more. instead of filling your frame with things and objects, be thoughtful about leaving some empty space so that your subject pops within the frame. this can be very balancing to the eye.
.jpg)
Take A Step Back
getting into a habit of incorporating negative space into your photographs is something that takes a little thoughtfulness when picking up your camera. while this can be done with any and every lens, i find it easiest to creative negative space with my wide angle lens because i can naturally fit more space within my frame. no matter what lens you are using, get in the habit of taking a step back. instead of getting really close to your subject, take a step back and observe how you can fit more negative and blank space into your frame to create a stronger composition.
do you use negative space when photographing? the next time you pick up your camera to photograph something, consider how intentionally leaving some blank space within your frame can help make your subject stand out and create more balance within your image. and when in doubt, take a small step back.
check out my latest ebook, the everyday photograph. it’s a guide to seeing the beauty of your everyday!
be sure to join my exclusive email list to receive my latest photography tips and tutorials. it’s free!
need some photography tips + inspiration? check out what posts are trending below!
.jpg)
-
[…] help with negative space? read more about how to use negative space thoughtfully within your […]


