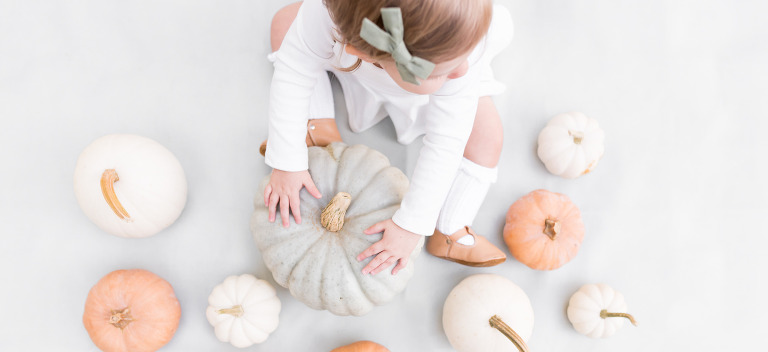
one of my most favorite ways to photograph is from above. i think it offers a really fun perspective and can make for some really interesting photographs. i also really like the reaction i get when i share my images that i have photographed from above. most people ask, “how did you doooooo that!?” because i like to photograph from above a lot, i have developed quite a few tricks for being successful at it. the next time you want to offer a new perspective, keep these 5 tricks for photographing from above in mind.
need a new photography project? check out what 5 photography projects every photographer should do.
5 Tricks For Photographing From Above
.jpg)
this post contains affiliate links. thank you in advance for supporting bethadilly photography.
before anything else, it’s important that you keep safety your first priority when photographing from above. always, always, always wear a camera strap when photographing from above. never attempt taking a photograph from a high angle without wearing a camera strap.
1. Use A Wide Angle Lens
wide angle lenses are the easiest way to get a photograph from above because you don’t have to get higher off of the ground to get the photo. because a wide angle lens allows you to get more of the setting within the frame and is good for working in tight spaces, it allows you to photograph from above without stepping on a stool. i photograph from above with my sigma art 24mm f/1.4 frequently, with my feet flat on the ground.
.jpg)
2. Use A Tilt Screen
one of my favorite things about the nikon d750 is the tilt screen on the back of the camera. it allows you to tilt the screen forward and monitor your composition in LIVE view while you are pointing your camera down. it allows me to hold my camera away from my body and photograph facing down, while the tilt screen allows me to see my photo. this works really great when i want to photograph a baby lying in a crib. it’s one of my favorite tricks for photographing from above.
.jpg)
3. Use A Step Stool
if you don’t have a tilt screen on your camera or a wide angle lens, one of the easiest tricks for photographing from above is using a simple step stool. i like to carry a step stool with me to sessions for moments when i want to photograph from above with my 50mm lens. its a quick and easy way to get a little height when i need it and works every time! plus, you can move it around to achieve height in any situation, wherever you are.
4. Look For Opportunities To Get Height
for those moments when you don’t have a step stool, look for natural areas in your surroundings that will give you height. some areas around my house that offer me quick height are stairways, chairs, ottomans, etc. again, be sure what you are stepping on will keep you safe before getting up high with your gear.
5. Use The iPhone Front Facing Camera
there are going to be times when you really want to be the subject of the photo, but you don’t want to have a DSLR over the top of your head. not to mention, it’s so heavy to lift! for those times, i love using my iPhone and switching the camera to front facing (selfie style) so i can see my composition on the screen as i take the photo from above. for the car photo at the top of this post, i raised and wedged my iPhone into the sunroof of my car and snapped the photo. (anything for a photo, right?)
photographing from above is so much fun and really offers a unique perspective. when done correctly, you will not only offer a fun perspective, but you will also be able to show surrounding elements within the photo that help to tell your story. by using these trick for photographing from above, you are bound to be more successful with your photos the next time to see an opportunity to photograph this way.
be sure to join my exclusive email list to receive my latest photography tips and tutorials. it’s free!
need some photography tips + inspiration? check out what posts are trending below!
week 3 of the bethadilly 52 has us looking at our photography style. for many this can be a struggle and, to be honest, it took me years to really define and perfect my photography style. if i am being really honest, i am still perfecting it and making small changes for the better as i try to represent myself through my photography in the most accurate way. when i think about my photography style during week 3, i think about being organic, honest, natural and simple through my images. every time i pick up my camera to photograph an object or human subject, i keep my photography style in mind. and having a new baby has really helped my images become effortlessly honest and has helped me focus more on the moment than perfecting the scene, something that has helped my photography style evolve into becoming more honest and organic.
to join in on the bethadilly 52, where we take one photo a week using the hashtag #thebethadilly52 on instagram, check out the prompt list.
this post contains affiliate links. thank you in advance for supporting bethadilly photography.
The Bethadilly 52 Week 3 – My Style
.jpg)
this photo was achieved using : nikon d750, sigma art 24mm f/1.4 lens.
my settings were : ISO 400 | f/2.8 | 1/125ss
. . .
to learn more about photography styles, be sure to read when you can say you’ve found your photography style.
be sure to join my exclusive email list to receive my latest photography tips and tutorials. it’s free!
need some photography tips + inspiration? check out what posts are trending below!
here’s the thing. and i mean this in a polite way. yoga pants and messy hair just don’t cut it as a professional outfit for photographing a client. yes, i know…as photographers we do just about anything to get a photo including laying on the ground, climbing trees and putting ourselves into physically uncomfortable positions. i understand the appeal to wearing comfortable clothing to photograph in, but i think it is possible to be comfortable and professional at the same time. for me, my clients pay a lot of money to have me photograph their family. they are paying for a professional service so i should display myself professionally. and if you are being paid for your photography, you should dress professional as well. even though you’re behind the camera, your professional image still matters. as you are contemplating how to dress for a photo session, keep these 5 tips in mind.
as you prepare to look amazing, help your clients look amazing too! here are 10 ideas for what to wear for family photos for your clients!
For Photographers : How To Dress For A Photo Session
.jpg)
this post contains affiliate links. thank you in advance for supporting bethadilly photography.
1. Be Aware of Color Casts
when considering how to dress for a photo session, make avoiding color casts your first priority. remember, bright colors can bounce off of your client’s skin and create unnatural skin tones…making editing in lightroom a nightmare! avoid wearing colors that are bright and vibrant, and stick with neutrals instead. when shopping, i make sure to buy neutral tops in grays, tans, whites, and creams to avoid color casts.
2. The Benefits of Wearing White
my closet is full of white tops, since white does not cast any color onto my clients when i wear it. also, as a bonus, it is possible for the white of your shirt to act as a natural reflector! it may not be as effective as an actual reflector, but can work!
3. Be Professional
hey, i love being comfortable just as much as the next person. and if you are photographing for yourself or your family, dress how you want. however, if you are having a client pay you to photograph them, it’s good practice to dress professionally. don’t worry, you can totally keep comfort in mind too! because i like to lay on the ground and climb things to get better composition and perspective, i love wearing a stretchy skinny jean. they are super comfortable, but professional! i personally love the skinny stretch jeans from american eagle. i wear a skinny jean paired with a flowing neutral shirt to stay comfortable, yet professional.
if you are worrying about your nice clothes getting dirty, delegate certain pieces to wear to photo sessions only. if i have a pair of jeans that are well loved but still professional, i set them aside for photo sessions. that way, i am not heart broken should they get dirty or ripped.
4. Be Careful With Accessories
accessories are the easiest way to dress up an outfit and turn an everyday outfit into something more professional. i am a huge fan of a statement necklace and often wear jeans, a white top and a fun necklace. when choosing accessories be careful that you don’t wear anything that reflects light. you know how when you are sitting in a room and notice little beads of light on your walls from your wedding ring or watch? that’s the light bouncing off your pretty jewelry. be careful with this, as you don’t want to cast unnatural light not your clients. again, editing nightmare!
5. Boots Or Flats Make The Best Footwear
if i am photographing a family downtown in a more urban setting, i choose flats. they are comfortable and easy to walk in. i also wear flats to my lifestyle newborn sessions because they are easy to slip off once i arrive at my client’s home, as i feel it is polite to remove your shoes when you are a guest in someone’s home. for my outdoor sessions that take place in parks or in settings that have more nature, i always opt for my hunter boots. they are firmly on my feet so i don’t slip out of them (i have a tendency to slip out of flats easily on grass or gravel), and they are tall enough to allow me to climb through tall grass and stay comfortable. plus, if my hunter boots get dirty, it takes a simple wet paper towel to make them brand new again.
when you consider how to dress for a photo session remember that you are representing your brand and setting the tone for your session. by dressing professional you are showing that you are offering a professional session. keep these tips in mind as you prepare for your next session.
be sure to join my exclusive email list to receive my latest photography tips and tutorials. it’s free!
need some photography tips + inspiration? check out what posts are trending below!
-
[…] need help figuring out what to wear to sessions? check out for photographers : how to dress for photo sessions. […]
when i first started accepting newborn clients, i found myself intimidated when they told me they had other children in addition to their newborn. i found myself stressing about how i would incorporate everyone into the session equally and, to be honest, how i would get everyone to cooperate all at the same time. fast forward to today, i have taken on so many newborn clients with older siblings and they are now my favorite session to photograph. with a little thought and preparation, newborns and older siblings can create some of the most honest and beautiful pictures. let me show you how to photograph newborn sessions with older siblings so you are more confident for your next session.
do the siblings have you stressing? check out my 10 tips for photographing newborns with siblings to get you started.
How To Photograph Newborn Sessions With Older Siblings
.jpg)
this post contains affiliate links. thank you in advance for supporting bethadilly photography.
all photos in this post were taken with my nikon d750 and sigma art 24mm f/1.4 lens.
1. Let Them Know You Care
try to remember one thing about older siblings of newborns…they are brand new to the role. i usually photograph my newborn clients within the first 2-3 weeks after birth, making these older siblings brand new big brothers or sisters. they are still adjusting to their new role and the fact that they now have to share their parents with this tiny little being. that being said, let them know you care. show the older sibling some attention first and foremost once you arrive at their home. while your first reaction may be to gush over the newborn, take some time giving the older sibling your attention first so they feel important. ask them to show you their house or their room and make them feel important too. this will help you once it’s time to pick up your camera and for them to cooperate for pictures, because they will love you for it.
.jpg)
2. Let Them Have The Spotlight, Too
again, they are starting to get the picture that it’s all about the baby, so let the older siblings know the session is about them too. have the parents look at their oldest child and cuddle them, throughout the session. this helps ensure that the older sibling feels involved and that they are in the spotlight, too. i love having parents go back and forth between looking at their oldest child and looking at their newborn, it helps create some genuine portraits.
.jpg)
3. Encourage Them To Get Close
when most photographers worry about how to photograph newborn sessions with siblings, their biggest concern is getting everyone in the frame at once. for me, this is the easiest part. just make sure everyone is close and encourage touch. everyone should be touching in some way, whether it is an arm around the shoulder or an older sibling gently tickling newborn toes. touch also encourages honesty and helps clients relax, which can help create honest portraits. start off by having the parents sit close to one another and then place the children around or on them to encourage close interaction.
.jpg)
4. Baby Kisses
it’s important to ask the parents if they are comfortable with their older sibling kissing their newborn. some parents are totally okay with it, while other parents may be hesitant so be sure to ask before attempting this type of photo. if the parents are fine with it, ask the older sibling to gently kiss their baby brother or sister on the nose. you could also tell them to touch their nose to the baby’s nose or, if the parents would like more distance, to kiss the baby’s toes. be sure to have your camera ready to document the moment, it’s going to be a photo your clients cherish forever. i like to use my sigma art 24mm f/1.4 lens for this photo, as it allows me to get more of the family within the frame while using a lower aperture to showcase the siblings primarily.
.jpg)
5. Go With the Flow
as hard as it sounds, be sure to sit back and allow the siblings to be themselves and do their thing. in the photo above, the older boy was off having a snack while i took the opportunity to get some individual portraits of the baby in the crib. before i knew it, this sweet little hand was sneaking into the crib to check on the baby. because i was ready and willing to let the moment happen, this photo contains an honest moment between brothers that is so beautiful. as photographers, we tend to arrive at sessions with a list of photos we want to take in our minds. while it’s important to get those initial photos, it’s also important that we stay aware of our surroundings and allow moments to play out. those are the moments that make the best photos.
.jpg)
6. Allow Time For Breaks
the best advice for how to photograph newborn sessions with older siblings is to begin the session with any photos that include the sibling, first and foremost. if i know there are older siblings, i begin my session with the family portrait and any photos of the older sibling with the newborn first. i do this because, while older siblings really love you and are willing to cooperate in the beginning, that quickly vanishes and they become disinterested after about 15 minutes. i like to get the older siblings photographed first so they are free to play during the rest of the session. for the siblings who like to participate throughout the session, be sure to build in natural breaks for them to have a snack so they stay energized. have dad feed them a snack while you photograph mom and the baby, or vice versa.
learning how to photograph newborn sessions with older siblings is something that comes with experience. while it can be intimidating at first, look at it as an opportunity to photograph really genuine photos. be sure to stay patient and understanding, as older siblings are going through a very new experience with their newborn brother and sister. and if something is not working, allow the older sibling to take a snack break and try again later. sometimes a little time away from the camera is just what they need.
do you have any tips on how to photograph newborn sessions with older siblings? be sure to leave your insight in the comments section below, i would love to learn what works for you!
be sure to join my exclusive email list to receive my latest photography tips and tutorials. it’s free!
need some photography tips + inspiration? check out what posts are trending below!
.jpg)
so, it happened. you are behind on editing and it seems like the possibility of catching up is far fetched. most of the time, this occurs with our personal photos. if you are in business like me, editing client images becomes a first priority and my personal images stack up, unedited. after my daughter was born, i simply got behind on editing. life was busy and, while i found time to pick up my camera to photograph, finding time to edit final images wasn’t happening. before i knew it, she was 8 months old and i had 10,000 photos to sort through. no joke, 10,000. yes, they needed to be culled, but still. 10,000. my first thought was, “she is going to be 1 year old in 4 months! i want to make a photo book of her first year!” i knew it was time to catch up on editing and, by doing 4 simple things, i caught up in about a month. if you need to catch up on editing, try doing these 4 things and feel the relief!
do you get stuck with deciding what photos to keep and which to toss? try these 3 things before you delete a photo.
4 Tricks To Catch Up On Editing If You’re Really Behind
.jpg)
this post contains affiliate links. thank you in advance for supporting bethadilly photography.
1. Set A Daily Goal
for me, i wanted to catch up in a hurry. the stress of being behind on editing was really getting to me, so i decided to set a daily goal to help me catch up on editing. my goal was to edit a minimum of 10 images per day. this meant, by the end of the day, i had at least 10 images that were fully edited and in their final state. some days i did more, some days i did the minimum 10. if sitting down daily to edit isn’t doable for you, set a weekly goal. the point is, set a goal that includes a specific number of complete images in a specific amount of time.
2. Dedicate A Time of Day For Editing
not everyone is an early bird like me, but i found that waking up about 2 hours before my baby in the morning allowed me to do a little editing. while i didn’t edit for 2 solid hours (remember, i only needed 10 images a day), i made it a goal to begin my day with editing. by starting my day with editing, i would really get into it and find that i would continue during nap time or after my daughter was in bed for the night. seeing progress is motivating. pick a time of day that is best for you and be consistent with it. pour yourself a cup of a relaxing beverage and allow editing to be time for yourself.
3. Share Images As You Go
there is a power of motivation that comes with sharing images. as you are editing, be sure to share images along the way on social media. for me, i found myself encouraged to edit because of all the kind comments and feedback i received on my images. as you catch up on editing, use this as an opportunity to update your social media.
4. Batch Edit When Possible
if possible, batch edit in lightroom when you can. batch editing can be done when you are editing a set of photos all taken on the same day, in the same light. batch editing allows you to edit the first picture from the set and then duplicate that edit on the remaining images. of course, you will have to go through those images and be sure the batch edit was successful. sometimes the light or white balance changes, even within minutes of taking two photos, so you may need to change your exposure or temperature as you check an image. even if you have to make minor adjustments, batch editing can still save you time.
don’t let being behind on editing discourage you, it’s going to be okay. by setting achievable editing goals, dedicating some time to edit, letting others encourage and enjoy your images as you edit and utilizing the batch editing feature in lightroom, you are bound to catch up on editing in no time! hey, if all else fails…bribe yourself. i used creating a photo book as a reward, so it’s totally okay to motivate yourself too.
be sure to join my exclusive email list to receive my latest photography tips and tutorials. it’s free!
need some photography tips + inspiration? check out what posts are trending below!
.jpg)
-
[…] are you behind on editing? it’s okay, we all are. here are 4 tips for catching up on editing when you are really behind. […]
-
[…] are you behind on editing? it’s okay, i’ve been there. here are some tips to catch up on editing when you’re really behind. […]


The Power of Faceless : 5 Times You Should Consider A Faceless Portrait - bethadilly - […] need help photographing successfully from above? […]