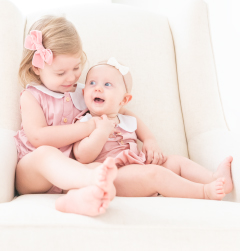
just like any mama, i have felt the constant struggle with keeping up with editing our personal family photos. being in business, my editing priority always falls to my clients because…they are paying me and there is a time crunch. without a time crunch, it makes it really easy to fall behind on editing personal images and, at the beginning of this year, i was ready to get back on track. with catching up on editing one of my main goals for this year, i found that creating a schedule for editing personal images was a game-changer when completing this task. and i was hugely successful. not only did i completely catch up on all my editing, but i did it in just 60 days and ended up with 1036 final edited photos of my daughter. (half of those were edited in the past 60 days, half were already done). if you feel like you are really behind on editing, see how creating a schedule for editing will help you get back on track.
do you work from home? here are some tips for being really productive with work, while parenting.
this post contains affiliate links. thank you in advance for supporting bethadilly photography.
Catching Up On Editing : Creating A Schedule To Get Back On Track
.jpg)
1. Analyze The Unedited
creating a schedule for catching up on editing starts with looking at, to put it nicely, how behind you are. open up your lightroom catalog and get an idea for how many months, or years, you are behind so you can get a general idea of what kind of task you are looking at. for me, i was about 6-10 months behind on editing photos of my daughter and noted that i many of the unedited photos still needed to be culled before editing.
having trouble deciding what photos to edit? check out what 3 things you should try before deleting a photo.
2. Set An End Date
once you get an idea of how many photos you need to edit, give yourself a firm end date to have them completed by. this is the first goal you will make for yourself and it’s important that you write it down and make it known. hold yourself accountable! for me, i wrote down the completion date in my planner because writing things in my planner is like writing them in stone.
3. Break Down The Task
once you know how many photos you need to edit and what date you want them to be completed by, decide on an editing schedule that works for you. would you rather sit down daily to edit a certain number of photos, or sit down weekly to edit a certain number of photos? what’s important here is that you set a firm schedule, including how often you will edit and how many pictures you will edit during those editing sessions. i am not kidding, tell yourself a number! for me, i made it my goal to sit down every single day to edit 10 photos. i did this during nap time, with a nice cup of coffee. yes, there were some days (particularly weekends), when i didn’t get the chance to edit the daily 10 images, so the next day i edited 20. in the end, it worked out to 10 images per day.
4. Have A Physical Checklist
having a checklist to remind me of my daily editing goal was the biggest game changer. for me, i used my powersheets and wrote “edit 10 photos” in the daily goals column. then, every day i would place a checkmark by my goal to say that i accomplished another day of editing. if you don’t have powersheets, i am telling you right now that they are completely necessary and have been the biggest reason why i have been so encouraged and motivated with my daily, weekly and monthly goals.
to read more about powersheets, see my post about how goal setting makes us better photographers.
5. Decide On A Time and Place
after you decide how often you will edit to complete your goal of catching up on editing, decide on a time and place you will do this. if you are editing once a week, maybe you will decide that heading to a coffee shop is your best bet for staying focused instead of being surrounded by kids and chores at home. if you are editing daily, decide on the exact time of day that works best for you. for me, it was during the first nap of the day and i edited on the couch, because i knew i would only edit if i was comfortable and had a nice cup of relaxing coffee.
6. Have a Motivator
as you are catching up on editing, give yourself a motivator to get it done. in other words, bribe yourself. it’s totally okay to do this. give yourself something to look forward to, besides the feeling of being all caught up. for me, i decided that i would make a really nice album through artifact uprising of my baby’s first year, if i caught up on my editing. decide on something to reward yourself, whether it is photography related or not. maybe your reward is a nice, quiet mama only day with a cup of starbucks and a relaxing pedicure.
catching up on editing can definitely seem like a daunting task, but it doesn’t have to be. you can do this! start with seeing how many pictures you need to edit, set a goal and an end date, be mindful of how you will complete your editing goal and give yourself a motivator. in no time, you will be all caught up.
be sure to join my exclusive email list to receive my latest photography tips and tutorials. it’s free!
need some photography tips + inspiration? check out what posts are trending below!
photography is a very powerful medium in that we can create so much emotion with a single image. there are so many ways to create emotion in photographs and it’s important that you do so, not only to photograph the moment accurately but to elicit a reaction from your audience. sometimes you will want your audience to feel happy, sad, excited, or confused. these are all some sort of emotion, and it’s up to you to decide what type of emotion you would like to create. check out what 4 things you should keep in mind to help portray more emotion within your images.
are you intimidated by shadows? read why you should embrace shadows in your photography.
4 Eye-Catching Ways To Create Emotion In Photographs
.jpg)
Consider Negative Space
using negative space within your image is a wonderful way to keep your viewer’s eye on your subject. and when their eye is on your subject, they are more likely to recognize and feel the emotion of the subject sooner. in the photo above, i used negative space to fill the frame with empty space as a way of encouraging my viewer to look at the baby. i also created an emotion of curiosity in the viewer, as they are intrigued to know what the baby is looking to. the subtle hint of the curtain on the top camera left paired with the light leads the viewer to believe that the baby is looking towards a window, even though i don’t offer that information clearly.
.jpg)
Consider Light
light doesn’t mean standing next to a window, it could mean playing with where the light falls within a room. with your goal to create emotion in photographs, look to light to inspire you. in the image above, i was intrigued with how the light was so bright, paired with a dark room. i loved the way the baby was looking to the light in amazement, allowing me to create a sense of wonderment with this image. think of how different this image would be if it had a brighter exposure. it would create an entirely different look and, therefore, created a different emotion.
.jpg)
Consider A Contrast Between Light and Dark
there is something so eye-catching about an image that contains a deep contrast between light and dark. in the image above, the darkness frames the subjects in the middle of the frame just as powerfully as the light frames them. you could argue that this image is framed twice, once with the dark shadows and a second time within the doorframe. creating a contrast between light and dark can create the emotion of interest and curiosity in the viewer.
.jpg)
Consider Your Edit
not all images have to be moody or dark to contain emotion. to create emotion in photographs, it is very important to consider your edit and your exposure. commonly, brighter exposures can mean happiness and being carefree. in the image above of me and my daughter, i chose a lighter edit to portray a soft emotion. it’s not to say that moodier edits can’t contain happiness, they certainly can. to experiment with this thought more, play with your exposure and see how it can drastically change the emotion of an image.
emotion is a very powerful part of a photograph. it is what encourages your audience to look at your photo longer and it is also what makes your photograph memorable. photos that contain emotion are very impactful because they leave a lasting impression on your audience, as you encourage them to feel something. and isn’t that one of our biggest goals with photography? to make someone feel something?
be sure to join my exclusive email list to receive my latest photography tips and tutorials. it’s free!
need some photography tips + inspiration? check out what posts are trending below!
-
[…] another powerful way to photograph is through emotion. be sure to check out the 4 eye-catching ways to create emotion in photographs. […]
-
[…] to learn more about how to create emotion in your images, be sure to read 4 eye-catching ways to create emotion in photographs. […]
-
[…] need help creating more emotion in your images? check out what 4 eye-catching ways you can bring more emotion into your photography. […]
-
[…] need help attracting your viewer’s eye? here are 4 ways to use emotion to create eye catching photographs. […]
week 9 of the bethadilly 52 has us challenging ourselves to take a really good photo for a black and white edit. when i took this image of my daughter’s toes sticking out from beneath her high chair, i knew it had the potential to be a really good black and white photo because of the contrast between dark and light. i had a lot of light entering in from camera right, allowing her little toes to peek into the light. i also had a lot of shadows within the frame as well, which meant that my contrast from dark to light was strong enough to create both shallow shadows on her legs and deep shadows inside of the highchair. i loved the black and white edit on this image because it allowed me to deepen the shadows further around her thigh area which, in comparison, showcased her toes in the light. the contrast between black and white also offers the photo a sense of balance that is visually pleasing.
to join in on the bethadilly 52, where we take one photo a week using the hashtag #thebethadilly52 on instagram, check out the prompt list.
this post contains affiliate links. thank you in advance for supporting bethadilly photography.
The Bethadilly 52 Week 9 – Black + White
.jpg)
this photo was achieved using : nikon d750 and sigma art 24mm f/1.4 lens.
my settings were : ISO 400 | f/2.8 | 1/125ss
. . .
to learn more about black + white edits, be sure to read 5 obvious times to convert a photo to black and white.
be sure to join my exclusive email list to receive my latest photography tips and tutorials. it’s free!
need some photography tips + inspiration? check out what posts are trending below!
when i first started my photography business, it was just my husband and i…no kids. in a way, my business was my first baby, as i poured my everyday into nurturing it and helping it grow. once my daughter was born, i had to learn how to not only be a great mom, but to also keep up a photography business that i had worked so hard to build. it was and is important to me to still keep my business going, as it is a wonderful way for me to have something, in addition to being a mom, that i work on. you see, my photography business is for me. it is a way for me to be able to get feed my creative side, while making some fun money. as moms, i think having something for us is important, whether that be continuing to work or dedicating time for just ourselves. and as the new year hit, i was ready to not only continue to build my business, but to be more productive every day on the business end. if you were to ask my husband, he would tell you that i have gotten more things accomplished in my first 2 months in 2017 than i did all of last year. and last year was crazy busy, so that’s telling you something. if you are struggling with productively working from home, try some of the things i am doing to help you create some goals and feel more accomplished as you complete them.
do you need a great new planner? check out the best planner for photographers and why i am obsessed with mine.
this post contains affiliate links. thank you in advance for supporting bethadilly photography.
Productively Working From Home : Balancing Family and Business
.jpg)
1. Have Powersheets
my biggest game changer, when it comes to productively working from home, is having powersheets. oh my gosh, they changed my entire working life. not only am i discovering new goals that i want to accomplish, but i am achieving them. it is because of powersheets that i have already written a blog post every day this year, written and designed a new eBook, taken two full participation photography classes, photographed professional sessions and still been a 100% hands on mom and make quality time for my family…all while getting 8+ hours of sleep each night. i kid you not, i have done all of those things so far this year and it’s only february 26th.
for more information about powersheets, check out my post setting goals : how it makes you a better photographer.
2. Set Strict Schedules
productively working from home means setting strict schedules. you are your own boss so you are in charge of either being successful with this, or not. it’s your choice. for me, i set really strict schedules for myself. i am up around 6:00am (remember, i get 8 hours of sleep still) to blog before the baby is up, spend the first nap of the day editing, and the second nap of the day working on eBook things. once my daughter sleeps, it is ready, set, go time for being productive. and once the husband is home from work and the baby is in bed, it’s us time. no work during family time. that is equally important. you must set aside work for your family. i only work during nap, which amounts to about 5 hours of day. i have to make those 5 hours count. (cue: the powersheets)
3. Dedicate Time For Social Media
i enjoy social media so much that it can hinder my work. knowing this, i either set my phone on the other side of the room or put my phone on silent so i can work more productively. social media is part of my business and it is important to keep up with it, but i do my best to post and monitor my posts only without scrolling through news feeds and getting lost in the world of social media, when i should be working.
4. Have A Dedicated Workspace
productively working form home means working as much as you can during your designated work time. the worst thing that people do is waste time setting up their workspace. have a dedicated workspace that is only for work. this doesn’t have to be fancy. while i have a home office, i work in our living room 98% of the time. my workspace consists of a laptop, a basket to keep my planner/powersheets/notebook, and a coffee table for much needed coffee. just set up a little space for you that has all you need so you minimize the time setting up and taking down your space. once your time for working is upon you, you should be working only.
there is something very challenging about productively working from home, but it can be done if you are dedicated and organized. get yourself a planner, seriously invest in some powersheets, say no to the distraction of social media and have a workspace for just your work things. all of these things together will support and encourage you in productively working from home and, like me, you will start getting more things done in less time! and less time spent working is more time spent with family. plus, being productive and feeling accomplished makes us feel so great! and when we feel great, we are better mamas and spouses.
be sure to join my exclusive email list to receive my latest photography tips and tutorials. it’s free!
need some photography tips + inspiration? check out what posts are trending below!
-
[…] do you work from home? here are some tips for being really productive with work, while parenting. […]
-
[…] working from home with kids it so much easier when you create balance. be sure to read about balancing family and business. […]
ok, so yes. there are 51 days until easter, but i just like to be prepared. plus, all this spring stuff has me throwing things in my shopping cart like a crazy lady. my husband thinks it’s pretty endearing that i am so prepared for the holidays but i think it is just the excitement of first holidays with a new baby that has me eager to start traditions. while i love the idea of making every holiday special for our daughter, i am also mindful to not go too overboard. simple is best and anything more than that can be overwhelming and unnecessary. as i created her first easter basket, i found that putting together something classic was my main goal. i find all the animated tv characters to be so tacky and not my style, so classic was my goal here. if you are looking to create a sweet and soft basket this year, here are some classic easter basket ideas for girls.
curious about what gear i use? be sure to check out what’s in my camera bag…it’s a lot less than you may think.
this post contains affiliate links. thank you in advance for supporting bethadilly photography.
Classic Easter Basket Ideas for Girls
.jpg)
Choose A Color Scheme
before you start shopping for an easter basket, select a color scheme to keep in mind. having a color scheme will allow you to shop for items that will flow together, which will make for a very visually pleasing basket. and, yes i know my one year old will not notice the well thought out color scheme, but i will. for her easter basket, i choose pale pinks and peaches.
.jpg)
The Basket
wanting to stay classic and traditional, i found a darling easter basket at our local home store. i loved the pale pink eyelit fabric and the simple white wicker. if you are looking for a simple basket, here are some similar classic easter baskets on amazon that look darling.
.jpg)
An Accessory
growing up, jelly shoes were some of my most memorable shoes and everything about them screams spring. not to mention, jelly shoes take on a classic feel, making them an obvious addition to her easter basket. i found these darling shoes at old navy this month.
.jpg)
Add Texture
adding things with obvious texture is a great way to create balance among the soft easter eggs and pale colors. you can create more texture by adding grass filler within the basket (which also helps to hold everything in place) or with items that have fun texture, like a bunny. i found this straw-looking bunny at hobby lobby. it’s important to note, this bunny isn’t for play, it’s just a decorative element to the easter basket, much like the paper grass is.
.jpg)
A Toy and A Story
when trying to think of a tradition to create for easter, i thought receiving a toy and a story was a nice classic gift. i love the idea of stories as gifts because they present a learning opportunity and stories, unlike other gifts, can be enjoyed for awhile. i also love the idea of a tradition because my childhood was full of them…which encourages me to create traditions for my children. (growing up, the easter bunny always brought swim suits to my sisters and me).
being that our daughter will be newly one year old on easter this year, the story in her easter basket is the classic pat the bunny and a ballerina doll found at target.
.jpg)
A Tall Filler
if your basket is tall, finding some filler with height is a great way to tie the bottom of the basket to the top. i found this darling easter egg tree at target and i loved the soft pop of color it provided to the overall look of the basket. as another filler, i added some pale pink and peach easter eggs that i purchased at michaels.
.jpg)
and there is the final product! and now, we wait for easter. classic easter basket ideas for girls is really quite simple if you just avoid all the loud character items and stick with the softer, timeless toys, accessories, and books. do you have any more classic easter basket ideas for girls? be sure to share them in the comment section to inspire us!
be sure to join my exclusive email list to receive my latest photography tips and tutorials. it’s free!
to read more of my mama adventures, be sure to check out what posts are trending below!
.jpg)
-
[…] need inspiration for designing easter baskets? check out how I avoided all the loud branding and i created a classic easter basket for my daughter. […]
-
[…] for our baby’s first easter, i wanted a really classic inspired easter basket and steered clear of all the loud branded items when filling it up. click here to take a peek inside her easter basket. […]
-
[…] are ready! in the meantime, to inspire you as you create your easter baskets this year, check out last year’s easter basket that i created for our little […]


Reagan - This was helpful! Thank you! I am so hoping you share with us how you make your baby book with artifact uprising! Love your style. 🙂
{beth} a-dilly - Thank you! I intended to share the book. 🙂